You can manage the details of a staff member on the Staff Details tab in the user management module.
This tab is not available when a learner is selected.
From the Staff Details tab, you can:
-
Search for and select the required staff member. See Find Users for more information.

-
Click the Staff Details tab.

The Staff Details tab is displayed, which holds information to the currently selected staff member.

- Enter the required details for the staff member.
The fields on the Staff Details tab are described in the following table.
| This field | Holds this information... |
|---|---|
| Staff Code | The staff code generated by the system when the record is saved (read-only). |
| Person Code | The person code generated by the system when the record is saved (read-only). |
| Title | The staff member's title. Select from the drop-down list. |
| Forename | The staff member's forename. |
| Middle Names | The staff member's middle names. |
| Surname | The staff member's surname. |
| Initials | The staff member's initials (read-only). |
| Gender | The staff member's gender. This defaults to the selected title if linked in reference data. |
| Date of Birth | The staff member’s date of birth, in the format dd/mm/yyyy. Click the Calendar button to display the calendar, where you can select the required date. |
| Mobile Number | The staff member’s mobile phone number. |
| The staff member’s primary email address. | |
| College Login |
The staff member's network ID. The value entered in this field can be used as the username when creating a user. |
| Contract Hours | The staff member’s maximum contracted hours. |
| Contact Hours | The number of hours a member of staff should teach learners in-person. |
| Appointment Description | The description of the staff member’s current appointment. |
| Internal Tel Number | The staff member’s telephone number at the institution. |
| Availability | Whether the staff member is available or not to be timetabled. Select from the drop-down list. |
| Organisation Unit 1 | The first organisation the member of staff is associated with. |
| Organisation Unit 2 | The second organisation the member of staff is associated with. |
| Is Active |
Whether the staff member is a current member of staff at the institution (that is: this is to identify staff that are no longer at the institution and to ensure only current staff are sent pastoral messages in Ontrack Teaching and Learning). This is selected by default for all existing staff members and when creating a new member of staff. |
-
Click Save.
The staff details are saved.
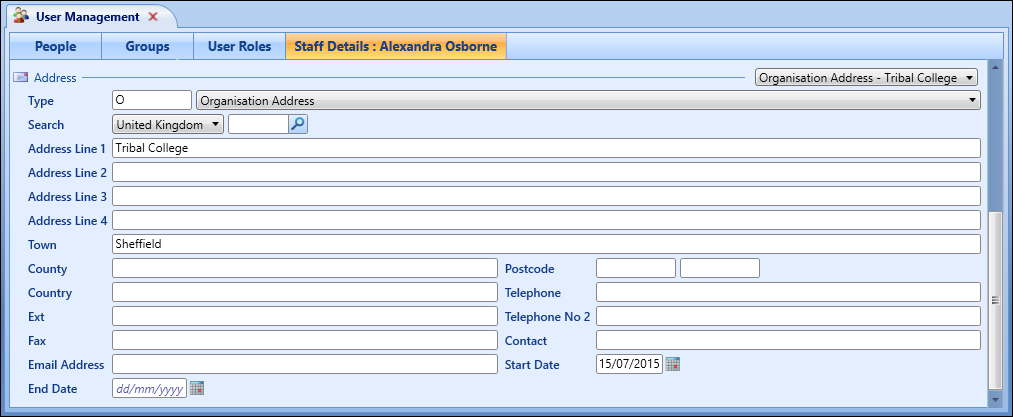
You can enter address information for the staff member into the Address section of the Staff Details tab. Data can be entered directly or by using the postcode software, if installed.

The address fields on the Staff Details tab are described in the following table.
| This field | Holds this information... |
|---|---|
| Type | The type of address. This defaults to the value set in the Default address type for Learner institution setting on the General (Cross-System) screen, if specified. |
| Search | Enter the address search criteria and then click the Search button to find addresses to select. |
| Address 1 | The first line of the address. |
| Address 2 | The second line of the address, if appropriate. |
| Address 3 | The third line of the address, if appropriate. |
| Address 4 | The fourth line of the address, if appropriate. |
| Postcode | The postcode of the address. |
| Country | The country of this address. |
| Telephone | The primary telephone number for this address. |
| Ext | The extension of the telephone number for this address. |
| Telephone No 2 | The secondary telephone number for this address. |
| Fax | The fax number for this address. |
| Contact | The contact name for this address. |
| Email Address |
The email address for this address. If AFD is used as the postcode look-up software and the Email Validation institution setting on the AFD page is set to 'Manual Search', you can click the Validate Email button on the Admin Commands ribbon to run the email validation.
|
| Start Date | The start date for this address. Click the Calendar button to display the calendar where you can select the required date. |
| End Date | The end date for this address. Click the Calendar button to display the calendar where you can select the required date. |
| UK Town | The postal town for this address. |
| UK County | The county for this address. |
| NZ City | The city for this address. |
When you have entered the address details, click Save to save the address record.
